Buying Garden Sun Screen Netting can feel simple until heat, wind, and plant needs compete. A dark mesh may look effective, yet it can block more light than delicate vegetables tolerate. I learned this after placing dense netting over young lettuce. The leaves stayed cool, but growth slowed noticeably.
This guide shares practical checks for choosing netting with greater confidence. It examines shade percentage, mesh strength, fabric quality, dimensions, edge finishing, eyelets, and installation options. A reliable product should provide consistent coverage without fraying after a few weeks outdoors. Measure the bed carefully. Extra material helps with fastening, but excessive fabric can flap dangerously in strong wind.
Consider your local weather and the plants beneath the screen. Tomatoes, herbs, seedlings, and flowering plants may require different light levels. A breathable, UV-stabilised material can reduce heat stress while allowing air movement. Still, no fabric performs perfectly in every garden. That is worth remembering.
Check product specifications, customer feedback, and the seller’s return terms. Look for clear shade ratings rather than vague claims such as “maximum protection.” Inspect the hem and attachment points before installation. Weak corners often fail first.
Some choices remain personal. Colour affects appearance, while weave density affects comfort and plant performance. My first preference was based on price alone, and it proved short-sighted. A slightly stronger netting may cost more, but replacement is more expensive. These ten buying tips will help you compare products realistically, avoid common oversights, and select Garden Sun Screen Netting suited to your space.
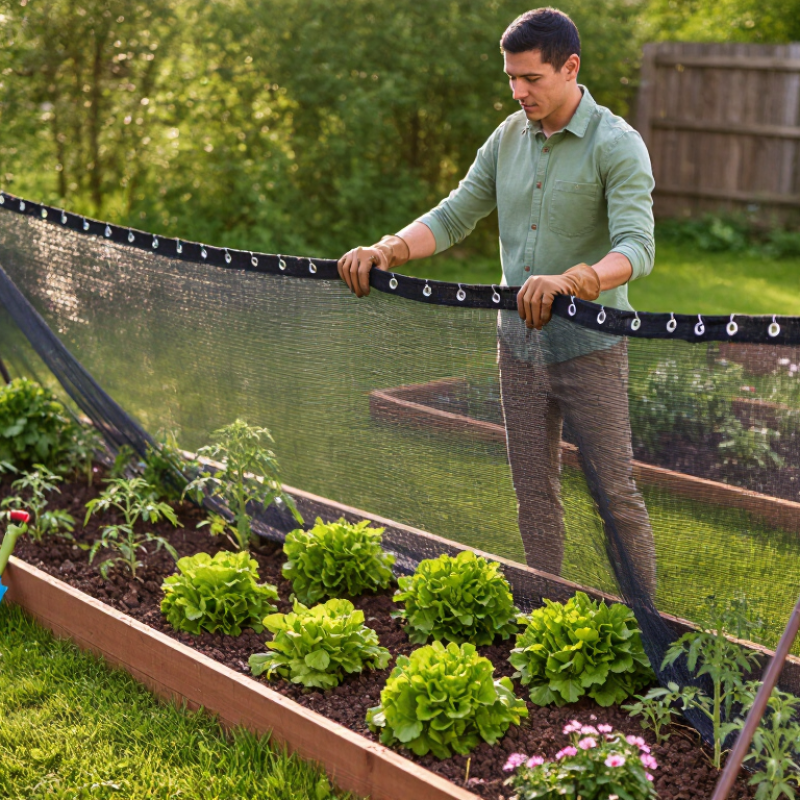
Choosing the right shade percentage matters more than choosing the darkest net. For sun-loving crops, 30–50% shade is usually a practical range. Tomatoes, peppers, cucumbers, and strawberries still need strong light for flowering and fruit development. A 30% net can soften harsh afternoon sun without making the bed gloomy. In hotter regions, 40–50% may reduce leaf scorch and moisture loss. Watch the plants closely. Pale leaves and weak stems can signal excessive shade.
Tip: Match the net to your local sunlight, not only the crop name. A pepper plant beside a reflective wall may need more protection than one growing under open skies. I once used a dense net over young peppers, expecting faster recovery. Growth slowed, and the soil stayed damp longer than expected. My judgment was wrong.
Tip: Check the net’s actual shade rating before buying. Product descriptions can be confusing, so compare the stated percentage with the crop’s needs. Install the net above the leaves, leaving space for airflow. Secure the edges firmly, but avoid trapping heat underneath. Lift or loosen the cover during cloudy periods if plants appear stretched. Keep a simple weekly record of leaf color, flowering, and soil moisture. Small changes reveal more than guesswork.
When buying garden sun screen netting, verify UV performance before judging color or density. HDPE nets commonly claim 80–95% UV reduction, but that figure needs context. A shade rating may describe visible sunlight, not ultraviolet radiation. These are different measurements.
Ask for a laboratory test report showing the wavelength range, test method, and sample thickness. A credible report may reference ISO 4892-3 for accelerated UV weathering or AATCC 183 for ultraviolet transmission testing. The U.S. Department of Energy notes that ultraviolet radiation can degrade outdoor polymers, especially under prolonged sunlight and heat. In practice, a net that feels strong in April may become brittle by late summer.
Look closely at the installation environment. A south-facing balcony with reflective concrete can expose HDPE fabric to intense radiation from several angles. I have seen loosely knitted mesh perform well for shade but lose flexibility at the edges after one season. That result was disappointing, and it showed why a headline percentage is not enough. Check whether the report measures total UV transmission or only a selected band. Also ask about accelerated-aging results, because new material data can hide future weakness. ISO 4892 guidance supports comparing appearance, cracking, and tensile changes after weathering, not just initial performance. Choose documented UV blocking above 80% when plants and people need reliable coverage, but treat 95% claims carefully. Higher is not automatically better.
10 Tips for Buying Garden Sun Screen Netting
Choosing garden sun screen netting starts with mesh and GSM, not color alone. Mesh controls sunlight, airflow, and visibility. GSM shows the fabric’s weight per square metre. A 100 g/m² net feels light and suits seasonal shade or small seedlings. It may tear when exposed to strong wind. A 200 g/m² option offers a useful balance for vegetable beds and patio areas. Nets near 340 g/m² provide stronger coverage, but they need secure supports and can restrict airflow.
Tip 1: Match the mesh opening to the plant. Fine mesh can reduce heat and block small insects, while wider mesh improves ventilation. Tip 2: Do not assume higher GSM always means better performance. A heavy net with weak stitching can still fail. Check edge binding, seam quality, and attachment points. Tip 3: Hold the sample toward sunlight. Uneven openings or thin patches are warning signs.
Experience matters in installation. Leave space between the net and leaves, especially during hot afternoons. Direct contact can trap heat and encourage moisture problems. Tip 4: Measure the frame carefully, then allow extra fabric for fastening. Tip 5: Test one section before covering the whole garden. I once chose a dense net for strong summer glare, but the plants became noticeably cooler and slower-growing. That decision needed reconsideration. Local wind, rain, and seasonal sunlight should influence the final GSM choice. Keep the net taut, but not drum-tight.
Compare mesh and GSM by evaluating fabric weight, strength potential, and theoretical coverage before choosing garden sun screen netting.
GSM means grams per square metre. The chart compares common weight points from 100 to 340 g/m². For a fixed 1 kg of material, theoretical coverage is calculated as 1,000 ÷ GSM, so heavier netting covers less area but uses more material per square metre. GSM alone does not determine shade percentage: mesh opening size, weave structure, and colour also affect light and airflow.
Garden sun-screen netting must soften sunlight without trapping hot, stagnant air. A 1–2 mm mesh opening can support this balance, but opening size alone does not define performance. Check open-area percentage, yarn thickness, and fabric weight. The USDA NRCS Conservation Practice Standard 380 notes that windbreaks often perform best near 40–60% porosity. This is a useful benchmark, not a guarantee.
Tips 1–4: Measure the opening with a caliper. Ask for tested porosity data. Compare mesh samples outdoors. Hold the fabric toward the prevailing wind. FAO Irrigation and Drainage Paper 56 identifies wind speed as a key factor affecting crop evapotranspiration. Too much blockage may raise humidity around leaves. Too little blockage may leave seedlings exposed. I have seen installers choose dense netting by appearance alone. That shortcut can disappoint.
Tips 5–7: Match the mesh to plant height and exposure. Use 1–2 mm openings in windy, sunny beds first. Leave a small air gap from the plants. Reinforce corners and anchor points. Do not stretch the net until openings become distorted. A simple airflow check helps: watch leaves behind the screen during a breezy afternoon. Gentle movement is useful. Complete stillness is not.
Tips 8–10: Inspect seams after strong weather. Clean dust that closes the openings. Replace brittle sections early. Check the supplier’s shade, porosity, and tensile-test figures. Reflect on local conditions before copying a neighbor’s setup; two gardens may face different wind corridors. Measurements beat assumptions.
Garden sun screen netting looks simple, but its outdoor rating deserves careful checking. Choose UV-stabilized HDPE, not ordinary plastic mesh. The material should resist brittleness, fading, and tearing under repeated sunlight. ASTM G154 testing commonly exposes samples to eight hours of UV at 60°C, followed by condensation at 50°C. However, laboratory hours do not equal guaranteed field years. That distinction matters.
Tip 1: Ask for the exact HDPE grade.
Tip 2: Request UV-stabilizer details.
Tip 3: Check whether the rating covers five to ten outdoor years.
Tip 4: Confirm the test standard and exposure cycle.
Tip 5: Examine mesh density, not only shade percentage.
The U.S. Environmental Protection Agency classifies a UV Index of 6 or 7 as high. Coastal, tropical, and high-altitude locations can create harsher exposure. A ten-year claim may therefore require local evidence, not marketing language.
Tip 6: Inspect reinforced edges and eyelets.
Tip 7: Select a tear strength suitable for wind loads.
Tip 8: Leave space between the net and hot surfaces.
Tip 9: Avoid sharp frames that cut the fabric.
Tip 10: Keep the supplier’s test report and purchase date.
ISO 4892-3 and ASTM G154 support accelerated weathering comparisons, but neither can perfectly reproduce rain, dust, hail, or installation stress. I have seen durable mesh fail early when tension was excessive. This is easy to overlook.
A five-year rating should be treated as a planning baseline, while a ten-year rating deserves verification through test data, warranty terms, and climate-specific references.
Look for documented UV blocking above 80%. A 95% claim needs careful verification. Ask whether the figure covers total UV transmission or one wavelength band.
Request a laboratory report showing the test method, wavelength range, and sample thickness. Check accelerated-aging results, not only new-material performance. A strong-looking sample may weaken after months of heat and sunlight.
No. Color and visible shade do not prove ultraviolet performance. A dense net may block more light but restrict airflow. The numbers need context.
A 100 g/m² net suits seasonal shade and small seedlings. A 200 g/m² net offers balanced coverage for beds and patios. A 340 g/m² net provides stronger coverage but needs firm supports.
Fine mesh can reduce heat and block small insects. Wider openings improve ventilation and visibility. Match the opening to the plant, climate, and wind conditions.
Check edge binding, stitching, seams, eyelets, and attachment points. Hold the sample toward sunlight. Uneven openings and thin patches signal possible weakness.
Leave space between the net and plant leaves. Direct contact can trap heat and moisture. Measure the frame carefully, then allow extra fabric for fastening. Keep the net taut, not drum-tight.
A five-year rating is a practical planning baseline. A ten-year rating requires test data, warranty details, and climate-specific evidence. Laboratory exposure cannot perfectly reproduce rain, dust, hail, or installation stress. I once trusted a durable-looking net too quickly. That judgment needed reconsideration.
Choosing the right Garden Sun Screen Netting can help create a healthier, more productive growing environment. Start by matching the shade percentage to your crops: sun-loving plants often perform well with 30–50% shade, while more sensitive plants may require additional protection. Check the net’s UV performance, as quality HDPE netting commonly blocks around 80–95% of ultraviolet radiation. It is also important to compare mesh design and fabric weight, with approximately 100–340 g/m² offering different levels of strength, durability, and coverage.
A practical net should balance airflow with protection from intense sunlight and wind. Mesh openings of about 1–2 mm can support ventilation while reducing exposure to harsh conditions. For long-term outdoor use, select UV-stabilized HDPE and confirm that the product has a stated service life of roughly 5–10 years. Considering shade, UV resistance, material weight, mesh size, and durability together will help you choose effective netting for your garden.

Chiyang Net